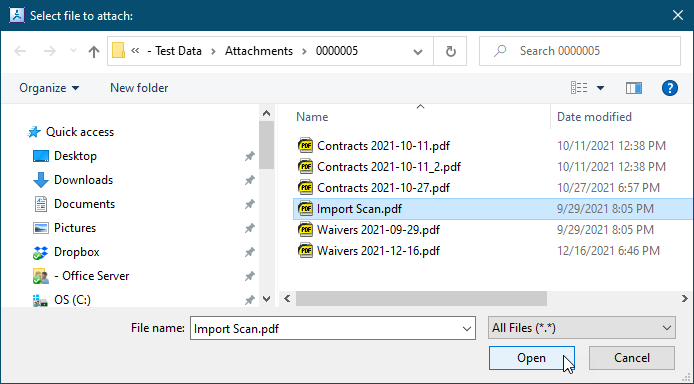
In the Attachments window for a member, click the Add New button.
Navigate to and open the document that you want to import.
Note: The software will remember the location where you last imported a file. If you are scanning documents this would be the folder where the scanned documents are saved.
If you are importing documents that were received by email, then this might be your Downloads folder.
If the imported document name begins with the name of one of your Attachment Categories (e.g. "Waiver"), then the document category will be set automatically.
If not, then select a category for the document.
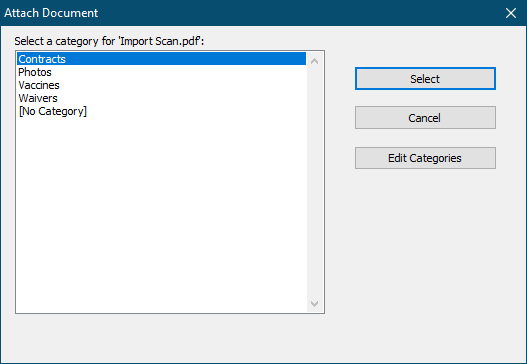
If the document will not fit a category then select “No Category”.
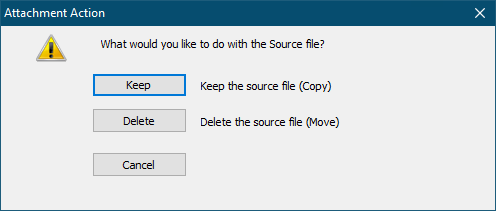
Specify whether you want to delete the original file.
Click Keep to keep the original file and Copy it to the member's Attachments folder.
Click Delete to delete the original file and Move it to the member's Attachments folder.
If the source folder for the document is a temporary location (such as “Downloads” or “Scanned Documents” folder), then click Delete. This will delete the file from its original location.
If you want to keep the original document (in its original location), then click Copy.
The document has now been added to this member’s record.
Note: If you add a Waiver or Vaccine document the Waivers tab will automatically update to indicate that a waiver/vaccine have been received.